 Megat Heikal | 26/08/2023
Introduction
Building your own extension in Opera is not really difficult. If you have knowledge of HTML, CSS, and Javascript, it should be sufficient to create simple extensions. Btw, creating Google Chrome extensions also follows a similar concept for building extensions in Opera, albeit with slight differences. In this blog post, I will show you how to create your own extension.
Step 1: Create directory project and manifest file on the directory
#Create a new directory for the project
$ mkdir my-opera-extension && cd my-opera-extension

#Create a new manifest file
$ touch manifest.json
Step 2: Configure manifest file to define the extension
In an extension, there are elements such as the name, description, author, version number, and other details. We need to configure our manifest file in JSON format to define these extension details. Additionally, there are other aspects that should be defined in the manifest if we are working with Windows or Tabs. These aspects need to be specified in the extension.
Now, open your code editor or IDE and navigate to the manifest file. Copy the provided text and save the file. It's that easy!
{
    "manifest_version": 2,
    "name": "Opera Extensions — Getting Started",
    "description": "A sample extension",
    "version": "1.0",
    "browser_action": {
        "default_popup": "index.html",
        "default_icon": "icon.png",
        "default_title": "My first extension"
    }
}
Step 3: Build a simple Popup on the extension
Our extension needs to have a user interface (UI), so we should create a popup for the extension. Here are the steps:
#Create index.html
$ touch index.html
Now, open your code editor or IDE and navigate to the index.html file. Copy the provided text and save the file. It's that easy!
<!DOCTYPE html>
<html style="width: 357px; height: 300px; border: 1px solid #e7e9eb; border-radius: 10px;">
    <body>
        <div>
            <h1>Hello, world!</h1>
            <p>This is my first web extension.</p>
            <p> Lorem ipsum dolor sit amet, consectetur adipiscing elit. Donec mattis nisl eget lacus dapibus vestibulum.</p>
        </div>
    </body>
</html>
Step 4: Add icon to your extension
You will need an icon for the toolbar button, which will be used to represent the extension in various locations. To make things easier, simply download this file and paste it into the working directory. And don't forget to rename it as 'icon.png'.
Step 5: Testing the extension
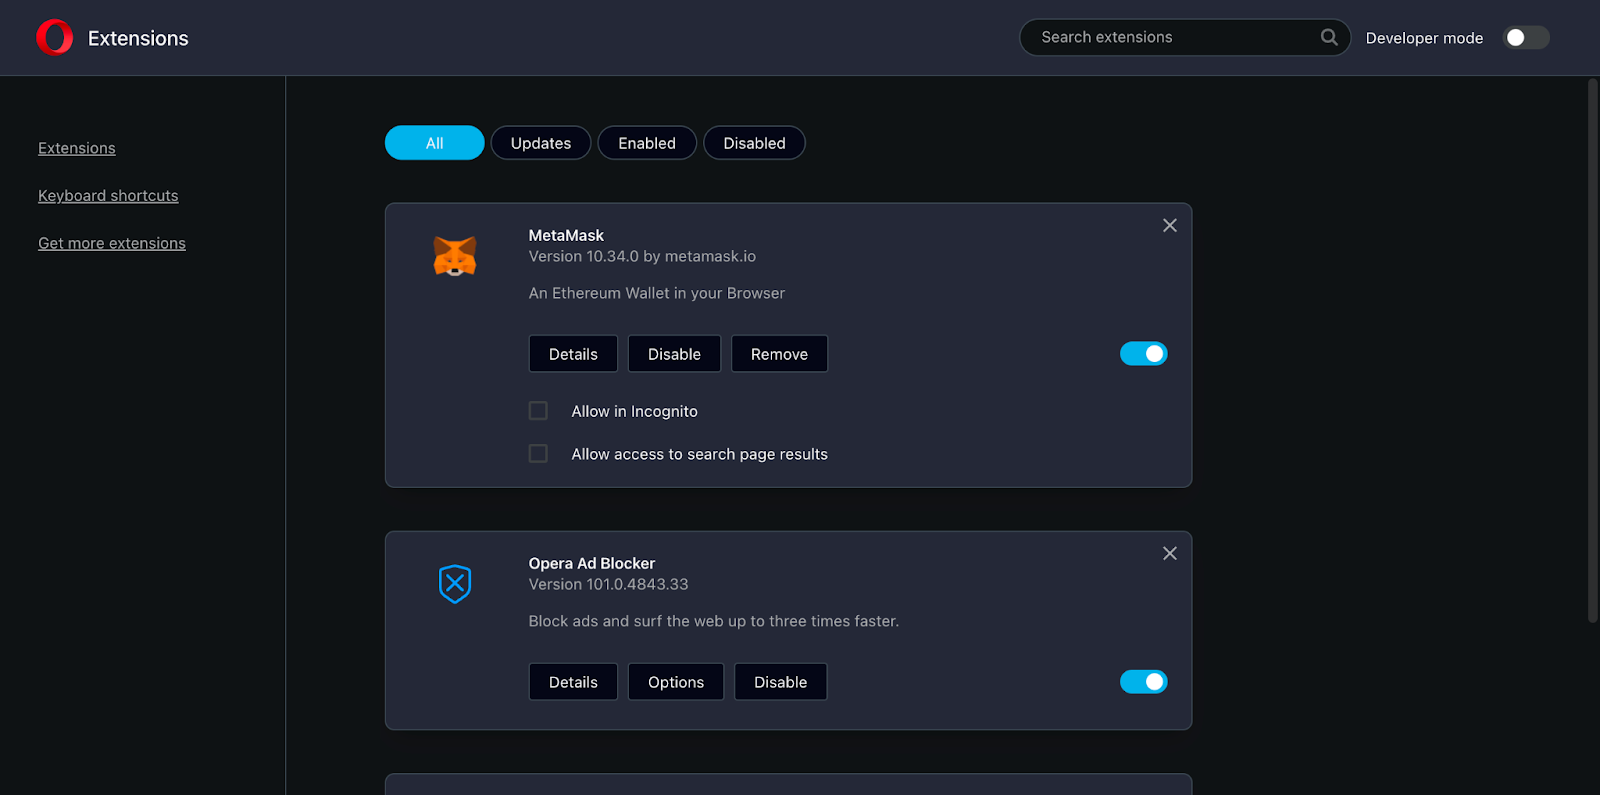
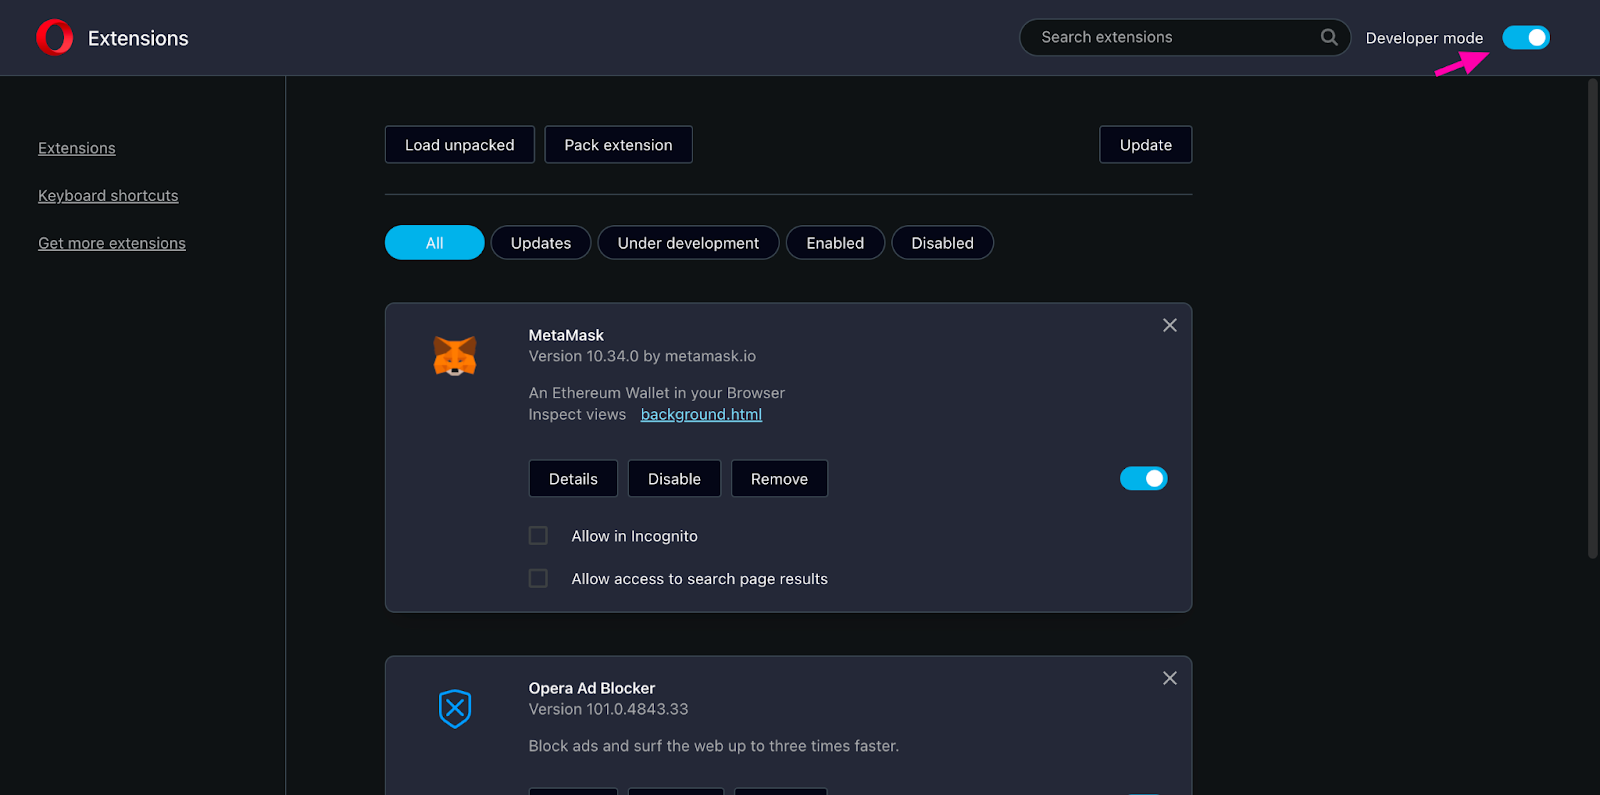
To test the final version of your extension, you will need to package and sign it through the Extension Settings page. Here are the steps:
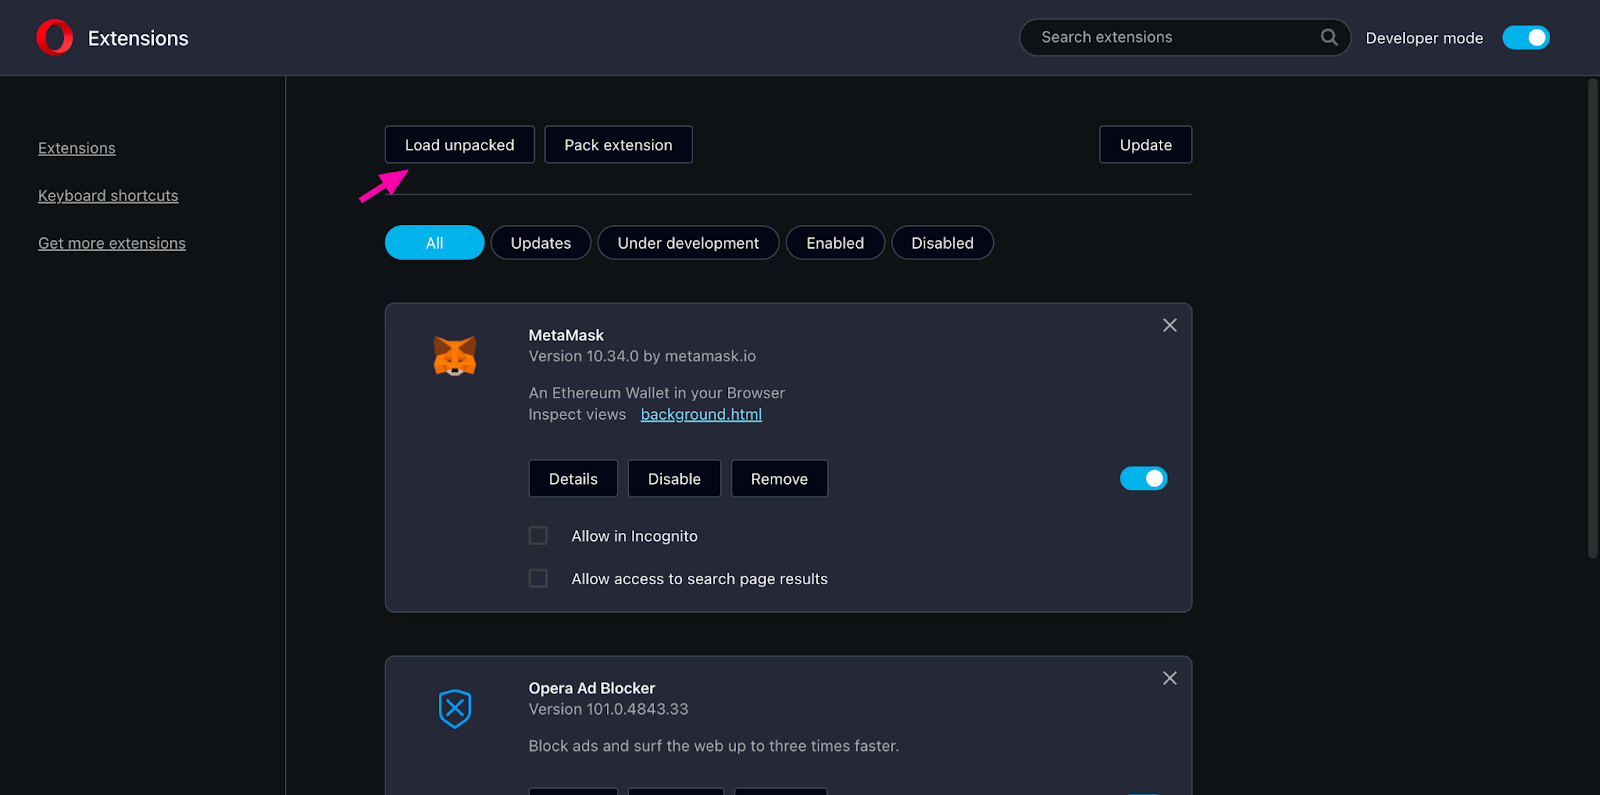
4 . Choose the directory where your extension is located.
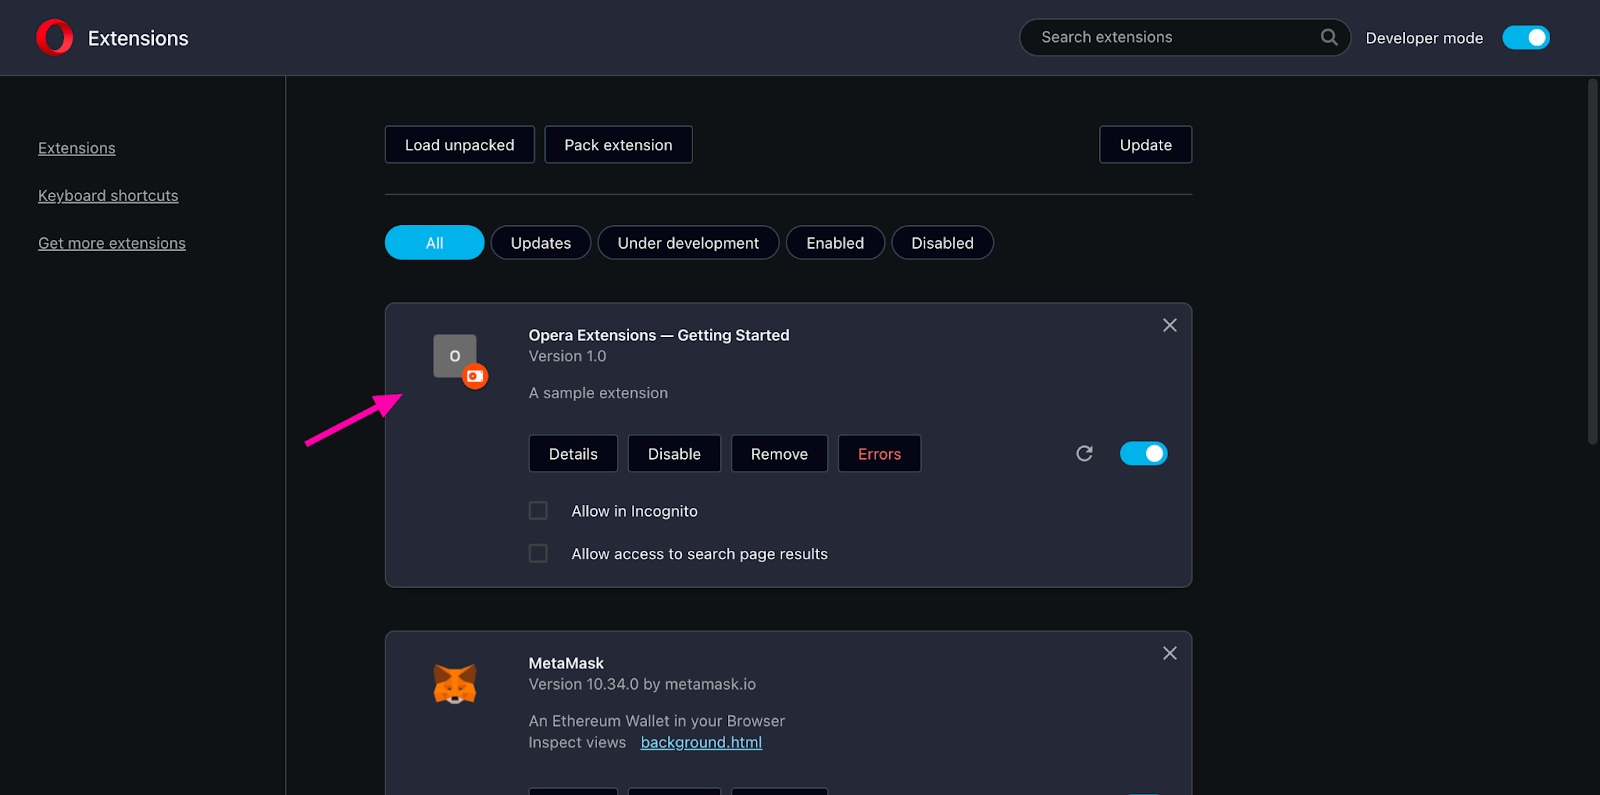 Tadaaa!!!!
That's it! Your extension should now be loaded in "Developer Mode." This mode grants you the capability to inspect different components of the extension using the browser's developer tools. You can even make modifications to your extension's code and instantly observe the effects by using the Reload button.
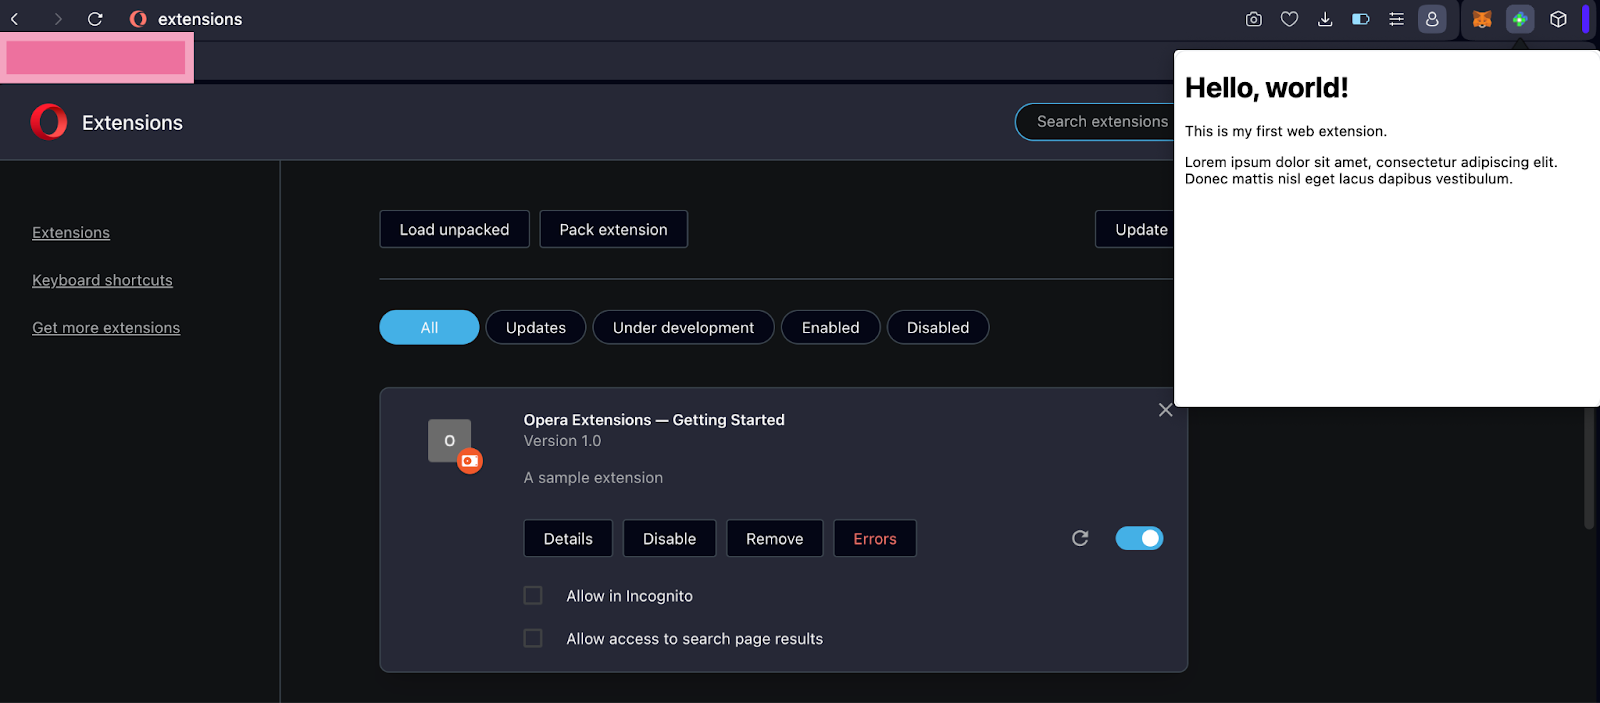
If everything goes smoothly, you should spot an icon at the top-right corner of the browser window, right next to the address bar. Clicking on this icon will open a popup page.
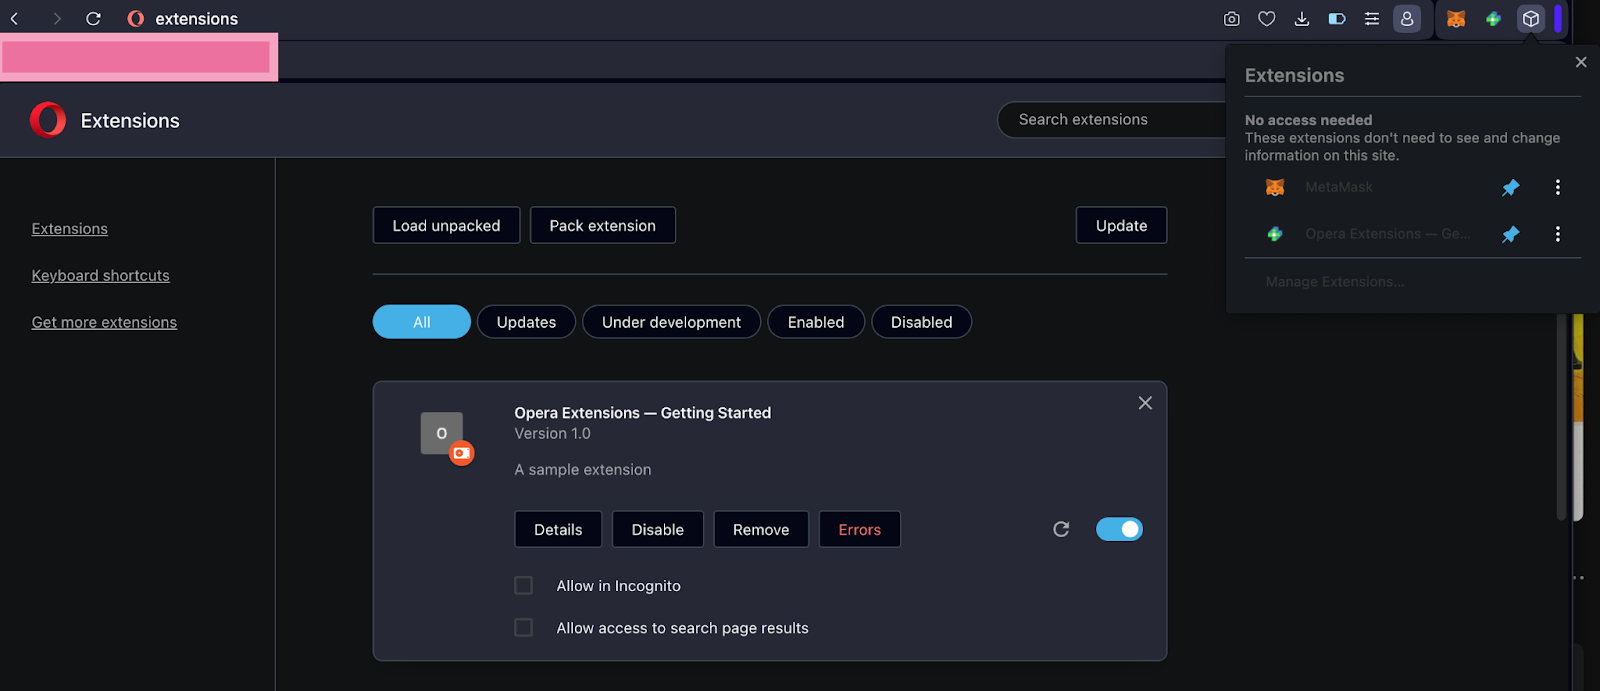
** But if the icon not show at the top-right corner of the browser, just click box icon and click pin icon on beside of extension **
Conclusion
I hope this blog post really helps you to build your first extension on the Opera. Creating extensions for Opera is very straightforward. Thank you for reading and stay tuned for more tutorials.